Mason Jar Wall Decor: A Board-Mounted Jar Display
Build a wall board that holds two or three mason jars in hose clamps. Covers spacing, attaching the clamps, seating the jars, hanging with hardware rated for the weight and keeping the contents light.

Tutorial at a glance
Materials
- Solid wood board, about 3/4 in thick
- 2 or 3 clean pint jars
- Stainless steel hose clamps
- Short wood screws and washers
- 120 and 220 grit sandpaper
- Wood stain or acrylic craft paint
- Hanging hardware rated for the weight
A board with two or three jars clamped to it is one of the most useful pieces of mason jar wall decor you can make. It lifts a small display off the counter, it suits a hallway, craft corner or bathroom, and the jars lift out whenever you want to change what is in them.
The build is simple: finish a board, screw metal hose clamps to it, tighten a jar into each clamp and hang the board. The part that deserves real care is the hanging, because glass on a wall has to stay there.
What you need
- A solid wood board about 3/4 in (19 mm) thick. For three pint jars, a board roughly 24 in (61 cm) long and 5 1/2 in (14 cm) wide gives comfortable spacing.
- Two or three clean pint jars, checked for chips and cracks. Recycle any damaged jar.
- One stainless steel hose clamp per jar, with a size range that covers the neck of your jar. Measure around the jar just below the threads before you buy.
- Short wood screws with flat washers, shorter than the thickness of the board.
- Sandpaper in 120 and 220 grit, plus wood stain or acrylic craft paint.
- Hanging hardware rated for the full weight of the finished piece, with fasteners suited to your wall.
- A drill, a screwdriver, a pencil, a tape measure and a level.
Sand and finish the board
Sand the board with 120 grit, then 220 grit, moving along the grain and rounding the sharp edges slightly. Work over paper so the dust is easy to gather, and wear a dust mask.
Wipe the dust away, then stain or paint the board. A mid-brown stain looks rustic, while white or soft gray paint looks cleaner and more modern. Whichever you choose, follow the manufacturer’s instructions for ventilation, application and drying time, and let the board dry fully before you attach anything to it.
Plan the spacing
Lay the dry board flat and stand the jars on it where they will hang. Leave at least 2 in (5 cm) between jars and from each end of the board, so that your fingers fit around a jar when you lift it out.
For three jars on a 24 in (61 cm) board, the jar centers fall at about 4 in, 12 in and 20 in (10, 30 and 51 cm) from one end. For two jars, try about 7 in and 17 in (18 and 43 cm). Mark each center lightly in pencil on a line drawn along the middle of the board.
Decide where the hangers will go on the back before you add clamps, so that no screw lands in the same spot from both sides.

Attach the clamps
- Open each clamp fully so that the band lies as flat as it can.
- Place the clamp on its pencil mark with the screw housing to one side, where you can reach it with a screwdriver once the jar is in place.
- Find the point on the band directly opposite the opening. If a slot in the band sits there, use it. If not, drill a small hole through the band with a bit made for metal, wearing eye protection.
- Drill a shallow pilot hole in the board at the mark.
- Drive a screw with a washer through the band into the pilot hole until the band is held tight against the wood.
- Repeat for the other clamps, checking that every screw housing faces the same way.
Tip
Hold a screw against the edge of the board before you drive it. If the tip reaches past the back face, choose a shorter screw.
Seat the jars
Stand a jar inside its open clamp with the band sitting on the smooth neck just below the threads. The shoulder of the jar and the thread ridge then stop the jar from slipping down through the band.
Tighten the clamp until the jar cannot twist or slide, and then stop. Over-tightening puts a lot of pressure on a narrow ring of glass and can crack the jar. If the jar still wobbles, loosen the clamp, reseat the jar so it sits square against the board and tighten again.
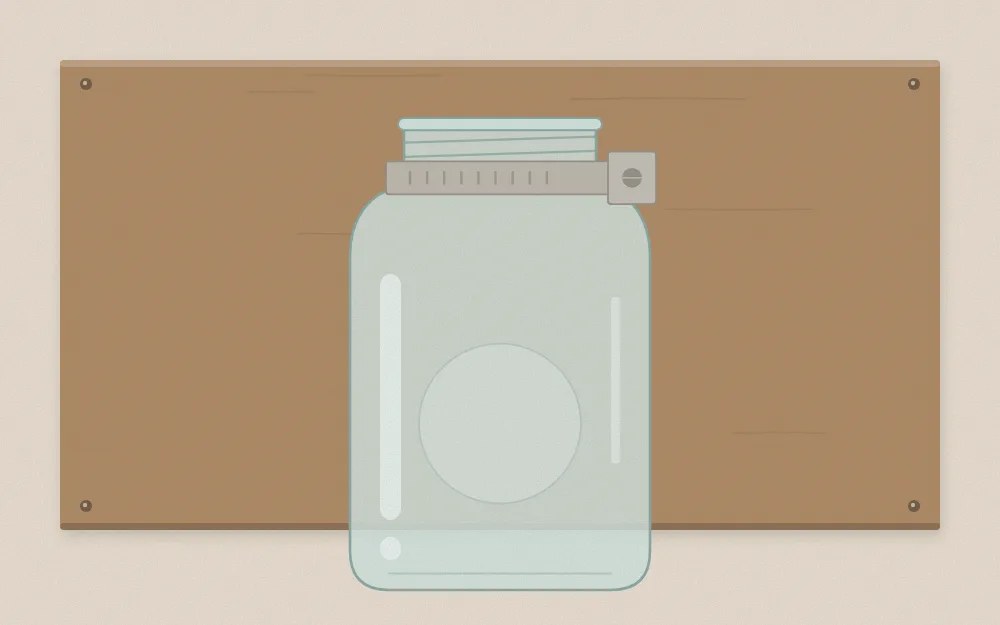
Take the jars out again before hanging, since the bare board is lighter and easier to level.
Hang the board safely
Weigh the finished piece with the jars and their contents in place, using a bathroom scale if you have one. Choose hangers and wall fasteners rated for more than that total.
The right fastener depends on the wall. Drywall, plaster, masonry and wood studs each call for different hardware, so follow the hardware maker’s instructions for your wall type and never rely on a single small nail. Use two fixing points, set level, so that the board cannot swing or tip.
Watch out
Hang the board away from doors that swing open, away from beds and seating, and away from narrow walkways where a shoulder or a bag could knock it. Keep it out of reach of young children and pets.
Once the board is up and level, press down on it firmly with your hand before you return the jars to their clamps. If it moves at all, take it down and fix the mounting.
What to put in the jars
Keep the contents light. Every ounce inside a jar pulls on the clamp, the board and the wall fixings.
| Room | Light contents that work | Leave out |
|---|---|---|
| Hallway or living room | Artificial stems, dried grasses | Water, stones, sand |
| Craft corner | Paintbrushes, pencils | Heavy tools, loose pins |
| Bathroom | Cotton swabs, cotton rounds | Full bottles, anything wet |
Artificial flowers are the classic choice, and the guide to faux flower mason jars explains how to cut and arrange stems so they sit well in a narrow opening. For a bathroom, a wall board pairs neatly with a countertop mason jar bathroom organizer finished in the same color.
Clear jars suit this project best because the clamp covers part of the glass anyway. If you do paint the jars, paint the outside only, leave the neck bare where the band grips, and read how to seal painted mason jars before you tighten metal against a finish.
Every few months, lift the jars out, look at each one for cracks, and check that the clamp screws and the wall fixings are still tight.
Frequently asked questions
What size hose clamp fits a mason jar?
It depends on the jar, so measure before buying. Wrap a tape measure around the neck just below the threads, divide by 3.14 to get the diameter, and choose a clamp whose size range includes that number with room to spare. Regular-mouth and wide-mouth jars need different clamps, and dimensions vary by maker.
Can I use fresh flowers and water in wall-mounted jars?
It is better to keep wall jars dry. Water adds a lot of weight to each clamp and to the wall fixings, and a drip or spill runs straight down the board and the wall. Artificial stems, dried grasses or light supplies such as brushes give a similar look with far less load.
How thick should the board be?
A board about three quarters of an inch thick is a practical minimum. It gives the clamp screws enough wood to grip without poking through the back, and it stays flat once it is hung. Thin craft plywood and soft, lightweight panels can split or let screws pull out under the weight of glass jars.


