Mason Jar Fillers: What to Put in a Jar for Display
Decorative, dry filler ideas for clear mason jars, grouped by look: natural, craft and seasonal. Includes how to layer fillers, vary the fill height, choose lid on or off and keep everything dust-free.
A clear jar does not need paint to look finished. The right mason jar fillers turn plain glass into a small display of texture and color, and you can change the contents in a minute when the season or the room changes.
Everything suggested here is dry, decorative and non-food. The fillers are sorted by the look they create, followed by notes on layering, fill height, lids and keeping a filled jar looking fresh.
Prepare the jar first
Fillers show every smear on the inside of the glass, so start with a clean jar. Check it for chips and cracks, and recycle it if you find any. Wash it in warm soapy water, avoid sudden temperature changes, and remove any label residue from the outside.
Let the jar dry completely, inside and out, before you fill it. Leave it upside down on a rack and then stand it upright in the open air for a while. A jar that is closed while still damp will fog on the inside, and natural fillers can turn musty.
Natural fillers
Natural materials give a quiet, rustic look and suit almost any room. Most are neutral in color, which makes them easy to mix.
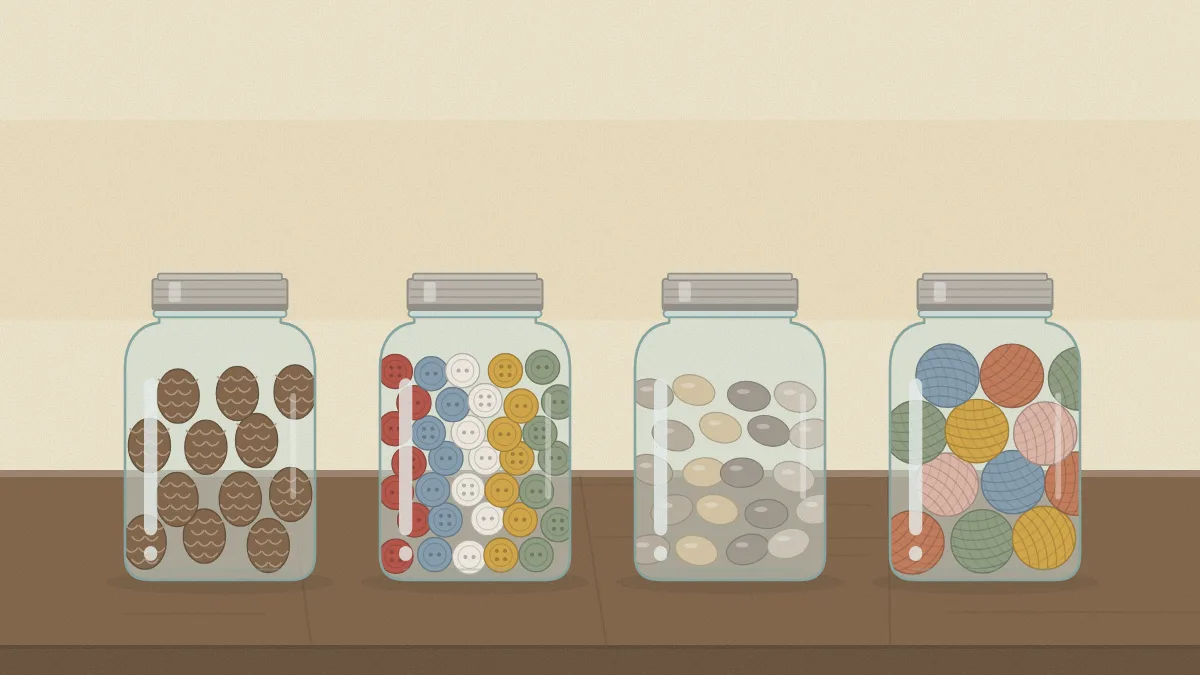
- Pinecones: small cones fill a jar quickly and add strong texture. Shake them outdoors first to remove loose debris.
- Preserved or artificial moss: a soft green layer that sets off harder materials. Buy it from a craft supplier so that it arrives dry.
- Smooth stones and pebbles: heavy and stable, good as a base layer. Rinse off any dust and dry them fully.
- Shells: pale and varied in shape. Use clean, dry craft shells, and place fragile ones near the top.
- Others: acorns, twig slices, bark pieces, dried seed pods and wine corks.
Anything gathered outdoors should be thoroughly dry before it goes into a jar. Spread it on paper in an airy place for several days, and leave out anything that still feels soft or damp.
Craft fillers
Craft supplies make cheerful fillers, and they have the advantage of being useful. A jar of buttons on a shelf is decoration until the day you need a button.
- Buttons: sort them into one color family for a calm look, or mix them for a brighter one.
- Small yarn balls: wind scrap yarn into balls about 1 1/2 in (4 cm) across. Three or four shades of one color look deliberate.
- Wooden beads: unfinished beads in two sizes give a clean, modern look.
- Thread spools: wooden or vintage-style spools stack well in a wide-mouth jar.
- Others: clothespins, ribbon ends rolled into coils, pom-poms and folded fabric scraps.

Seasonal fillers
Seasonal fillers let you update a shelf without redecorating it. Keep one or two clear jars as permanent pieces and change only what is inside.
| Season | Fillers | Colors to try |
|---|---|---|
| Spring | Artificial moss, faux eggs, silk petals | Soft green, cream, pale yellow |
| Summer | Shells, sea-glass-style pebbles, sand | White, sand, pale blue |
| Fall | Faux leaves, acorns, small faux pumpkins | Rust, mustard, brown |
| Winter | Shatterproof ornaments, pinecones, faux berries | White, silver, deep green |
For a full set of autumn projects that go beyond fillers, see the collection of fall mason jar crafts.
A short strand of lights tucked among ornaments or faux leaves adds a soft glow in the evening. Use battery-operated LED string lights only, follow the maker’s instructions, and read the guide to mason jar fairy lights for where to hide the battery pack.
How to layer fillers
Layers work when each one looks clearly different from the one beside it. Change the size, the texture or the color between layers, and ideally two of the three.
- Start with the heaviest and smallest material, such as pebbles or sand, to a depth of about 1 in (2.5 cm). It steadies the jar.
- Add a soft middle layer, such as moss, about the same depth. Press it gently against the glass so that small pieces from above cannot fall through.
- Finish with the largest pieces, such as pinecones or ornaments, and turn the best side of each one toward the front.
Three layers are plenty for a pint or quart jar. More than that starts to look striped and busy.

Tip
Pour fine fillers through a paper funnel and tilt the jar as you go. A sloped layer looks more natural than a perfectly level one.
Fill to different heights
When several filled jars stand together, vary the fill level. One jar filled to the shoulder, one about two thirds full and one half full look more relaxed than three filled to the brim.
Large fillers such as pinecones can rise slightly above the rim of an open jar. Small fillers such as buttons and beads look best when they stop at or below the shoulder, where the glass begins to curve in. For advice on arranging the finished jars with books and plants, see the guide to mason jar shelf decor.
Lid on or lid off
Both choices work. A closed jar looks neat and keeps dust out, which suits small, fiddly fillers. An open jar looks more casual and suits large pieces that rise above the rim.
A middle option is to use the screw band alone, with no flat lid insert. It finishes the rim with a line of metal and keeps the jar open. If you close a jar, make sure the contents are bone dry first.
Keeping fillers dry and dust-free
Dry fillers and water do not mix. Do not add water to a jar of moss, pinecones, wood or shells, and keep filled jars away from sinks, steamy rooms and windowsills that collect condensation.
- Dust open jars every week or two with a soft, dry brush.
- Empty the jar every few months, wipe the inside with a dry cloth and refill it.
- Keep jars out of strong direct sun, which fades moss, fabric and dyed materials.
- Throw away any natural filler that smells musty or shows spots.
Watch out
Beads, buttons, pebbles and other loose fillers are small parts. Keep filled jars away from young children and pets, and choose a lidded jar on a high shelf if either shares the room.
Frequently asked questions
What is the cheapest thing to fill a mason jar with?
Materials you already have cost nothing. Spare buttons, scrap yarn wound into small balls, wine corks, clothespins and ribbon ends all look good behind glass. From outdoors, pinecones, acorns and pebbles work well once they are completely dry. A single material in one jar usually looks better than a mix of leftovers.
How do I stop the inside of a filled jar from fogging?
Fog means moisture is trapped inside. Empty the jar, dry the glass with a lint-free cloth and leave the jar and the filler in open air until both are fully dry. Refill it and either leave the lid off or use only the screw band, and keep the jar away from steamy rooms and cold windowsills.
Can I mix several fillers in one jar?
Yes, within limits. Two or three materials are enough for one jar, and they should differ clearly in size or texture so the layers stay distinct. Keep the colors related, such as browns with green or white with pale blue. If the result looks busy, remove one material instead of adding another.