Sewing Kit in a Jar: A Handmade Gift With a Pincushion Lid
Turn a pint jar into a mending kit with a padded pincushion on the lid. Includes fabric cutting sizes, step-by-step lid instructions and a packing list.
Tutorial at a glance
Materials
- Clean pint jar with two-piece lid
- Cotton fabric circle
- Polyester fiberfill
- Strong thread and needle
- Tacky glue
- Felt or thin card scrap
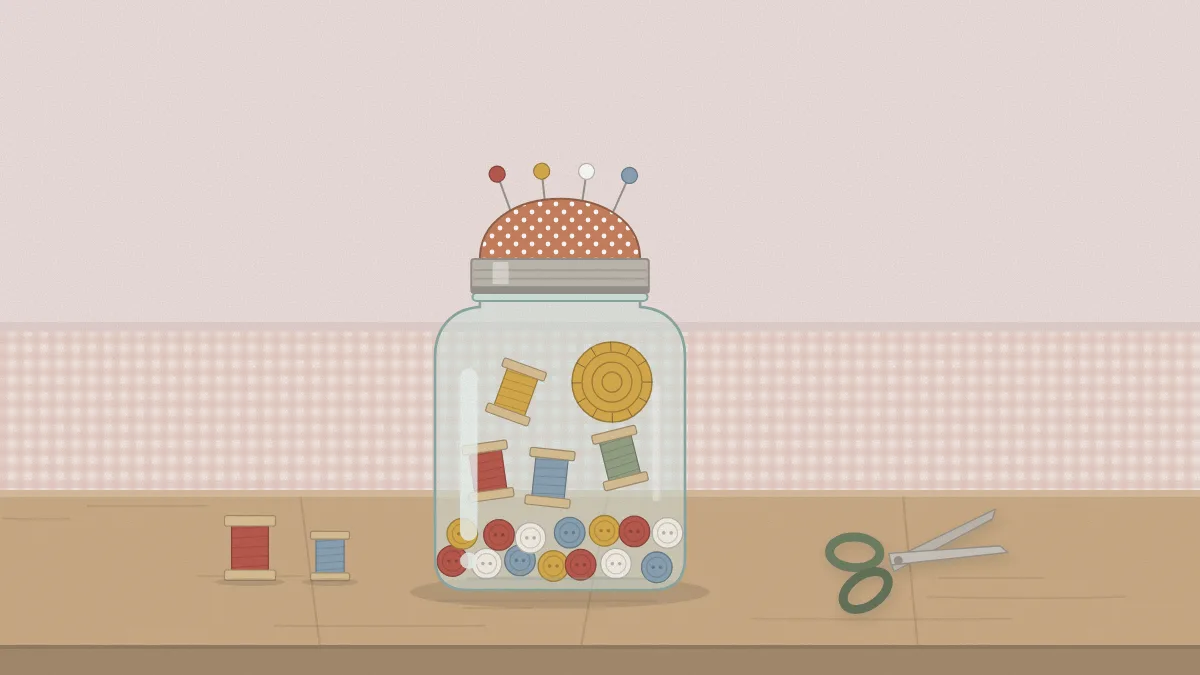
A sewing kit in a jar is one of the few handmade gifts that gets used for years. The jar holds thread, needles and buttons where they can be seen, and the lid becomes a padded pincushion, so nothing has to be dug out of a drawer when a hem drops.
The whole project is a little hand sewing and some glue. The pincushion sits on the flat lid insert and is held in place by the screw band, which means you can still open and close the jar normally.
What You Need
- One clean pint (16 oz) jar with its two-piece lid
- A piece of tightly woven cotton fabric, about 7 in (18 cm) square
- A handful of polyester fiberfill or wool stuffing
- Strong thread and a hand-sewing needle
- Tacky glue or clear-drying craft glue
- A scrap of felt or thin card for the underside
- Scissors, a pencil and a ruler
Either mouth size works. A wide-mouth jar gives a bigger cushion and an easier opening for hands; a regular-mouth jar looks neater and uses less fabric. Check the glass for chips and cracks first, and recycle a damaged jar instead of using it.

Cut the Fabric Circle
The fabric has to cover the stuffing and wrap under the insert, so the circle is roughly twice as wide as the lid. Lids vary by maker, so measure your own insert before cutting.
| Mouth size | Lid insert, about | Fabric circle, about |
|---|---|---|
| Regular | 2 3/4 in (70 mm) | 5 1/2 in (14 cm) |
| Wide | 3 3/8 in (86 mm) | 6 1/2 in (16.5 cm) |
Trace around a small plate or bowl of the right width on the back of the fabric and cut along the line. Quilting cotton is ideal. Skip stretchy knits and loose weaves, which let pins slide through and stuffing poke out.
Make the Pincushion Top
- Sew a gathering stitch. Thread the needle with a doubled length of strong thread and knot the end. Sew a running stitch all the way around the circle, about 1/4 in (6 mm) from the edge, with stitches roughly that long. Leave the needle attached.
- Add the stuffing. Lay the circle face down. Place a firm handful of stuffing in the center, about the size of a tennis ball, and shape it into a mound.
- Place the insert. Set the lid insert on the stuffing with the plain metal top facing down into it. The underside with the sealing ring faces you.
- Gather. Pull the thread so the fabric draws up and over the edge of the insert. Even out the folds with your fingers, pull snug and take three or four stitches across the gathers to lock them. Knot and trim.
- Check the dome. Turn it over. The cushion should feel firm and spring back when pressed. If it is flat or soft, loosen the gathers and push in more stuffing; a soft cushion lets pins tip over.
- Glue the gathers. Run a thin line of tacky glue under the gathered fabric edge on the underside of the insert and press it flat. Let it air dry as the label directs.
Tip
Stuff more than seems reasonable. The band will compress the edge of the cushion, and a tightly packed dome holds pins upright and keeps its shape.
Fit the Cushion Into the Band
Push the padded dome up through the screw band from underneath. The stuffing squeezes through the opening and the rim of the insert catches inside the band, exactly as it would on an ordinary lid.
If the cushion sits loose, add a thin line of glue around the inside lip of the band and press the insert against it. Cut a circle of felt or thin card slightly smaller than the insert and glue it over the raw gathers so the underside looks finished. Leave the lid face up, off the jar, until the glue has dried as the label directs.

For a flat fabric top without padding, the method in the guide to fabric-covered jar lids is quicker and uses the same circle of cotton.
Fill the Jar
Choose compact basics over a large assortment. A pint holds more than it seems to, but the kit should come out and go back in without a struggle.
- Thread: four or five small spools in white, black, gray, navy and beige
- Needles: an assorted pack kept in its card or a small needle book
- Buttons: a mix of shirt buttons in a tiny envelope or tin
- Tape measure: a soft one, rolled and held with a paper band
- Scissors: small embroidery or folding scissors with a blade cover
- Extras: safety pins on a ring, a seam ripper with its cap, a few straight pins in the cushion
Stand the thread spools around the edge with their colors facing the glass, then set the scissors and tape measure in the center. Slide the needle card down one side so it reads from outside, and drop the button envelope on top. If the contents rattle, a small square of folded felt at the base quiets them and doubles as a place to park a threaded needle.
Safety Notes for the Recipient
Watch out
This jar holds needles, pins, scissors and buttons. It is not a gift for young children, and it should be stored away from small children and pets. Keep the blade cover on the scissors and the cap on the seam ripper.
Push only a few pins into the cushion before giving the jar, and push them in at a slant so the points stay buried in the stuffing. The metal insert underneath stops them from going through into the jar.
Present It
The pincushion is the decoration, so the rest can stay plain. A length of ribbon or a strip of the same cotton tied around the neck is enough, with a small tag that lists what is inside. For a wrapped version that still shows the lid, see how to wrap a mason jar gift.
If you are assembling presents for several people, the sewing kit sits well beside a yarn notions jar or a stationery jar; the full list is in the roundup of mason jar gift ideas.
Frequently asked questions
What is the best stuffing for a pincushion lid?
Polyester fiberfill is easy to find and packs firmly. Wool stuffing also works well and holds pins snugly. Whichever you choose, use more than you expect and pack it tightly, because a loosely filled cushion flattens under the band and lets pins lean over.
Can the jar still be opened once the pincushion is attached?
Yes. The cushion is built on the flat lid insert and held by the screw band, so the lid twists on and off as usual. Gluing the insert to the band is optional, but it means the top lifts off in one piece instead of two.
Will pins go through the cushion into the jar?
The metal lid insert sits under the stuffing and stops pin points from passing through. Pushing pins in at a slant keeps the points buried in the padding. The kit still contains sharp items, so it should be stored out of reach of young children.